For shoppers in the United States, a water tint is a simple way to add sheer color without the weight of traditional lipstick. Apply it to clean, lightly moisturized lips, remove excess balm, work in thin layers, and blend quickly before the formula dries.
The key is speed and control. Water tints can set fast, and dry lips may make the color look uneven. With the right prep and a small amount of product, you can create a soft wash of color, a blurred stain, or a stronger lip look.

What Is a Water Tint?
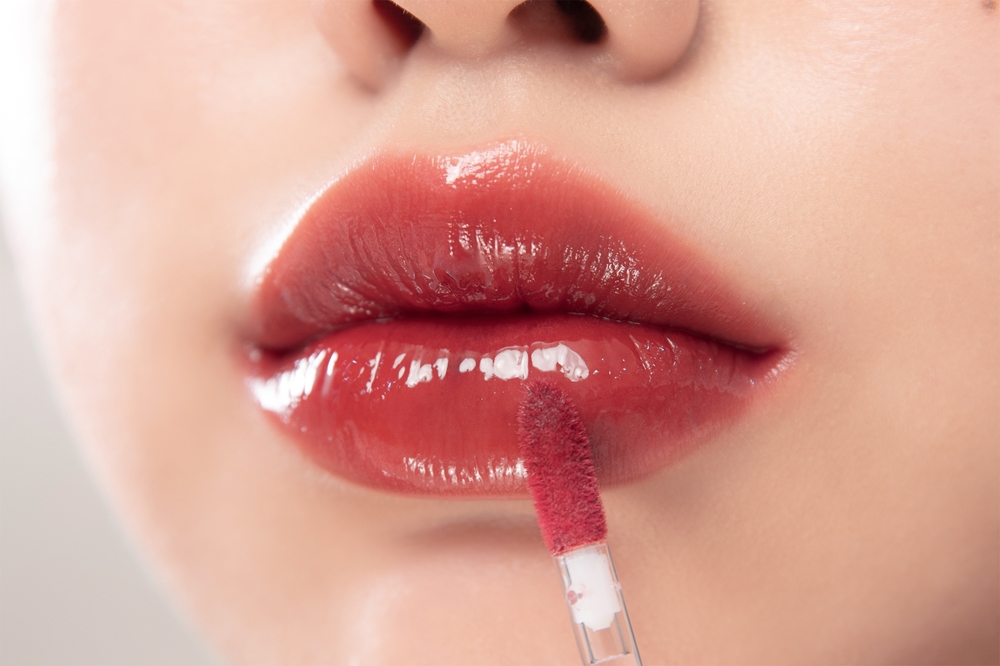
A water tint is a lightweight lip color with a thin, often fluid texture. It usually gives a stain-like finish instead of a thick layer of pigment. Some formulas look glossy when first applied, then dry to a soft or natural finish.
Water tints differ from several other lip products:
- Lip gloss adds shine but may provide little lasting color.
- Lip balm mainly adds moisture and comfort.
- Liquid lipstick often gives more pigment and a fuller coating.
- Lip stain is a broad term for color that remains after some of the surface product wears away.
- Water tint usually refers to a thin, water-based or watery-feeling lip color.
A water tint may be sheer, medium, or buildable. The exact result depends on the formula, your natural lip color, the amount applied, and whether your lips are smooth or flaky.
What You Need Before Applying Lip Tint
You only need a few items:
- A water tint made for use on the lips.
- A clean tissue or cotton swab.
- A lip balm.
- A small lip brush, if you want more control.
- Makeup remover or an oil-based cleanser for removal.
Check the label before use. A product intended only for cheeks or skin should not be placed on the lips unless the manufacturer states that it is lip-safe. The lip area is sensitive, and some pigments or fragrance ingredients may not be suitable for use inside or around the mouth.
If the tint is new to you, test a small amount on the outer arm first. This is not a guarantee that you will avoid a lip reaction, but it can help you notice an obvious irritation before applying the product near your mouth.

How to Apply Water Tint on Lips: Step-by-Step
Follow these steps for an even water tint application.
1. Start with clean lips
Remove old makeup, food, oil, and heavy balm. A clean surface helps the tint spread more evenly and reduces the chance of patchy color.
Use a gentle, damp cloth if your lips have loose flakes. Do not scrub hard. Strong rubbing can leave the lips more irritated and may make dry patches look worse.
2. Add a thin layer of lip balm
Apply a small amount of plain lip balm if your lips feel dry. Let it sit for a few minutes.
Then blot away the excess with a tissue. This step matters because a thick layer of balm can dilute the tint, stop it from setting, or make the color slide toward the lip line.
If your lips are already smooth and comfortable, you may skip balm. A water tint often applies best to lips that are clean and only lightly hydrated.
3. Shake the product if the label says to do so
Some liquid tints contain ingredients that can settle while the product rests. If the package instructs you to shake it, do so before opening.
Wipe excess product from the applicator against the inside of the tube. Too much liquid can pool in the center of the lips or bleed beyond the edges.
4. Apply a small amount
Place a few small dots on the lower lip. Start near the center, where you usually want the strongest color.
Press your lips together once, then use your fingertip, a clean lip brush, or the applicator to spread the tint. Move quickly because thin formulas may begin to dry within seconds.
Use less product than you think you need. You can add another layer, but removing a dark stain is harder than adding more color.
5. Blend toward the edges
For a soft gradient, keep most of the pigment in the center and blend it outward. Use short tapping motions rather than dragging the product across dry skin.
For full lip coverage, trace the natural lip shape with the tip of the applicator or a small brush. Stay inside the lip line until you know how the formula behaves.
A clean cotton swab can soften a hard edge before the tint sets.
6. Let the first layer dry
Keep your lips slightly apart for a short time. Avoid rubbing them together repeatedly while the tint dries, since this can move color into the creases.
Once the first layer looks even, decide whether you want more intensity. Most water tints build better with two thin layers than with one thick layer.
7. Add a second layer if needed
Apply another small amount to the center or across the whole lip. Blend right away.
Wait until the second layer sets before adding gloss or balm. If you apply a creamy product too soon, it may lift the tint and create uneven spots.
8. Clean the edges
Inspect the skin around your lips. Remove stray color with a cotton swab dampened with makeup remover.
If the tint has stained outside the lip line, use an oil-based remover or cleansing balm. Press the remover against the area for several seconds, then wipe gently instead of scrubbing.

How to Create Different Water Tint Looks
The same tint can create several effects.
Soft gradient lips
Apply most of the product to the center of the lower lip. Press your lips together, then tap the color toward the edges.
Add a small amount to the center of the upper lip. This gives the lips a diffused look with deeper color in the middle.
Even, natural-looking color
Apply a thin layer across both lips. Blend around the corners and along the lower lip line.
Use a second thin layer only where the color looks weak. This method keeps the result light and avoids a heavy coating.
More intense color
Apply one thin layer, let it dry, and add a second. Repeat only if the product instructions allow layering.
Do not assume that more product will always create a smoother result. Some water tints become darker in spots when layered over areas that have already dried.
Glossy tint
Let the tint dry first. Then add a clear lip gloss or a small amount of balm.
Choose a thin top layer so you do not disturb the stain. Dab the gloss on rather than rubbing it across the lips.
Defined lip shape
Use a lip brush for the corners and outer edges. A brush gives you more control than a large doe-foot applicator.
You can also apply a compatible lip liner first, but check the formula pairing. A very waxy liner may keep the water tint from spreading evenly.

How to Make Water Tint Last Longer
Water tint lasts longer when it bonds to a clean, even surface.
Use these habits:
- Remove excess balm before applying the tint.
- Apply thin layers instead of one thick layer.
- Let each layer dry before adding another.
- Avoid rubbing your lips together while the product sets.
- Blot greasy food and drinks rather than wiping your lips repeatedly.
- Carry the tint for a small touch-up after eating.
Long wear is not guaranteed. Oils can break down or lift many lip colors, and friction from food, cups, napkins, and talking can remove pigment.
A tint may also fade unevenly if your lips are very dry. In that case, comfort and skin care matter more than adding extra color.

Why Is My Water Tint Patchy?
Patchy color usually comes from uneven lip texture, too much product, or applying the tint over a heavy balm.
Try this troubleshooting guide:
| Symptom | Likely cause | What to do |
|---|---|---|
| Dark spots in the center | Too much product was placed in one area | Use fewer drops and spread them at once |
| Color skips over dry areas | Flaking or rough lip texture | Use balm first, then blot before tinting |
| Tint fades within minutes | Oily balm, food, or drink lifted the color | Start with clean lips and let the tint dry |
| Edges look harsh | The tint dried before blending | Work in smaller sections and use a brush |
| Color looks too dark | Several layers were added too quickly | Remove the product and restart with one thin layer |
| Lips feel tight or sting | Irritation or sensitivity | Remove the product and stop using it |
If the tint dries before you can blend it, apply one small section at a time. For example, place color on the lower lip, blend it, and then move to the upper lip.
If the formula repeatedly looks uneven, the issue may be the product rather than your technique. Some water tints are more forgiving than others.
Water Tint Safety and Removal
Use only a product labeled for lips. Cosmetic products in the United States are regulated by the U.S. Food and Drug Administration, but most cosmetics do not receive FDA approval before they reach the market. Companies remain responsible for making sure their products are safe and properly labeled under applicable law.
Review the ingredient list if you have known sensitivities. Fragrance, flavor, preservatives, and some color additives can bother certain people.
Stop using the tint if you notice burning, swelling, itching, rash, blisters, or ongoing dryness. Remove it gently. Seek medical care promptly for significant swelling, trouble breathing, or symptoms that spread beyond the application area.
Do not share a lip tint. Sharing can transfer germs, especially when the applicator touches the lips and returns to the container.
Keep the product closed when you are not using it. Follow the package storage instructions, and discard it if the smell, texture, or color changes. Do not add water to a cosmetic to thin it, because this can affect its preservation.
To remove a water tint:
- Apply cleansing balm, micellar water, or an oil-based remover.
- Hold a damp cotton pad on the lips for several seconds.
- Wipe gently without scrubbing.
- Wash away any residue.
- Apply a plain lip balm if the lips feel dry.

Water Tint vs. Lip Stain: Which Should You Choose?
Choose a water tint if you want a thin texture, a sheer wash of color, or a buildable finish. It often suits people who dislike the feel of heavy lipstick.
Choose a traditional lip stain if you want stronger color that may remain after the surface layer wears away. “Lip stain” covers many formulas, so its texture can range from watery to creamy.
Choose a tinted balm if comfort and moisture matter more than strong staying power. Choose liquid lipstick when you want opaque coverage and a more defined look.
The best option depends on the finish you want, your lip texture, and how much touch-up you accept. No lip color stays unchanged through meals, oil, friction, and time.

Frequently Asked Questions
Do you apply lip balm before or after water tint?
Apply a thin layer before the tint if your lips are dry, then blot away the excess. You can add balm after the tint dries if you want more comfort or shine.
Should water tint go on wet or dry lips?
Apply it to clean, mostly dry lips. A small amount of absorbed moisture is fine, but water, oil, or thick balm on the surface can make the color uneven.
Can you use water tint as blush?
Only use it on the cheeks if the product label says it is safe and suitable for cheek use. A lip-only product may contain ingredients or pigments not intended for facial skin.
How do you remove a lip tint quickly?
Use an oil-based makeup remover or cleansing balm. Let it sit on the lips briefly, then wipe gently. Avoid harsh scrubbing, which can irritate the skin.
Why does my lip tint look darker after it dries?
Some formulas deepen as they set. Apply a small test amount first, wait for it to dry, and then decide whether you need another layer.
Key Takeaways
- Start with clean lips and remove excess balm.
- Apply a small amount of water tint.
- Blend quickly before the formula dries.
- Build color with thin layers.
- Use a brush or cotton swab for sharper edges.
- Remove the product if it causes burning, swelling, itching, or a rash.
- Choose a lip-safe product and follow its label directions.
Conclusion
Applying water tint on lips is easiest when you use less product, work fast, and keep the lip surface smooth. Begin with a clean base, blot away extra balm, blend each small layer, and let the color set before adding gloss.
If the result is patchy, start over rather than adding more product. A fresh, thin application usually gives a softer and more even finish.